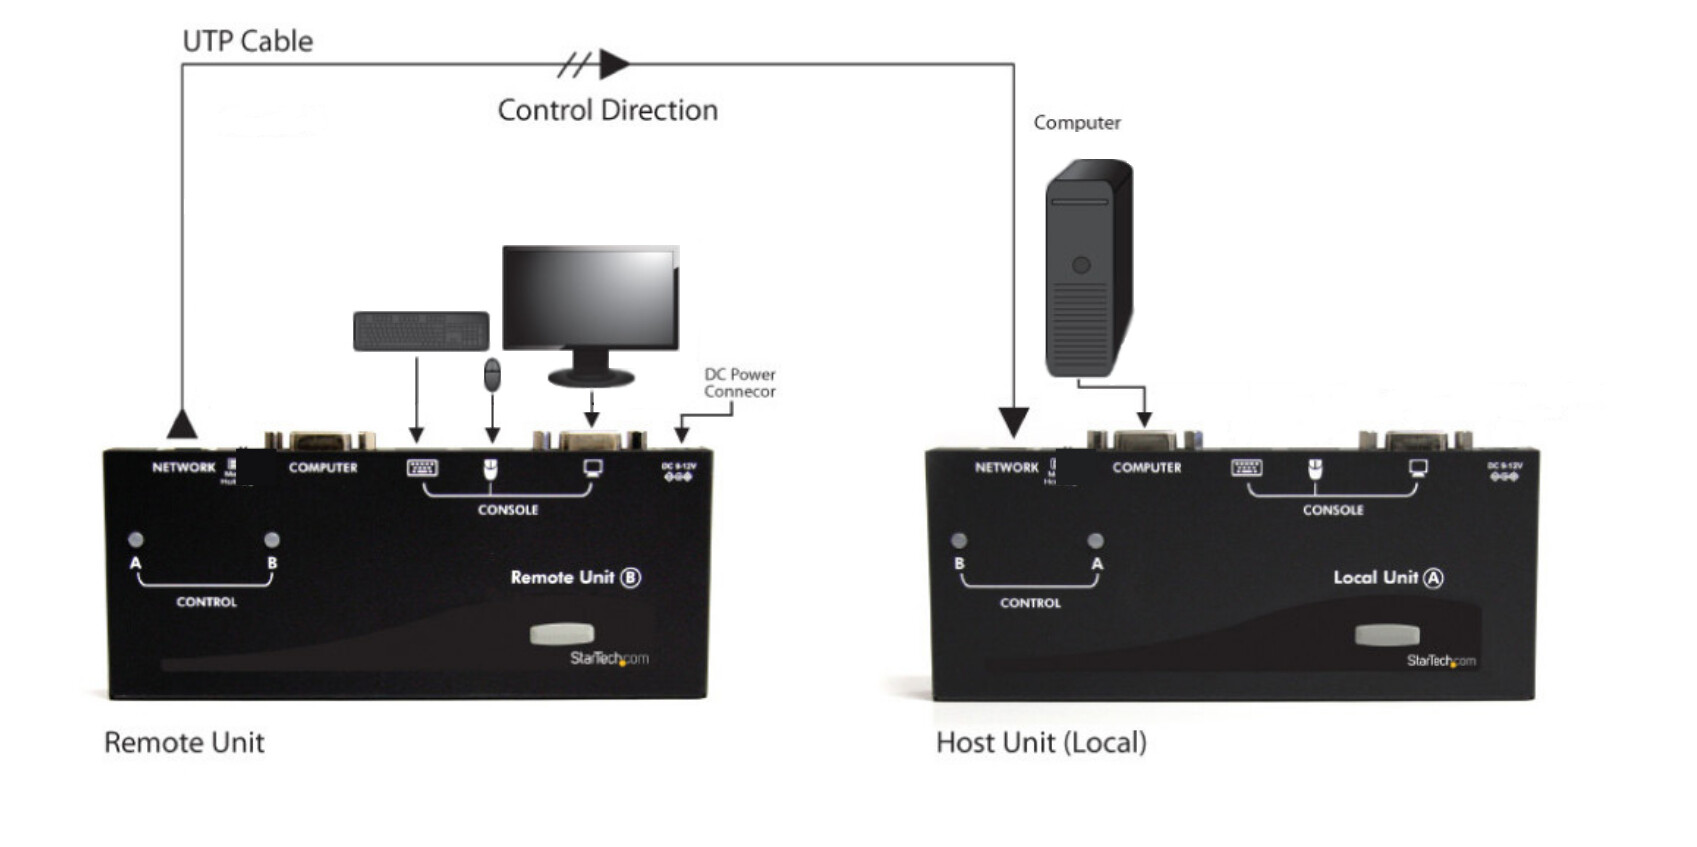
This guide outlines the steps to connect a StarTech.com KVM extender (SV565UTPU) by positioning the local and remote units to extend a single computer and peripherals. As shown in the following diagram:
-
Place the Local Unit near the computer.
-
Switch off the computer and disconnect any connected devices.
-
Using the provided StarTech.com integrated KVM cable, connect the end of the cable with the two connectors (USB and VGA) to the VGA Out port and a USB port on the computer. Then, connect the opposite end with the single connector (Grey) to the gray-coded port labeled COMPUTER on the Local Unit of the KVM extender.
-
Connect the CAT5 UTP (network cable) to the port labeled NETWORK on the local unit, while connecting other side of the CAT5 UTP to the NETWORK port on the remote unit
-
Place the Remote Unit near the remote keyboard/mouse/monitor setup.
-
On the remote unit connect the USB mouse, keyboard, and a VGA monitor to the indicators marked as CONSOLE on the remote unit
-
On the remote unit connect the provided power adapter to the power plug port.
The following setup works best when the LED control indicators are set to the left most position on each unit:

Changing the LED Indicator position can be done via the physical button on each unit.
NOTE: The Host Unit can draw power from the Host computer system. If it cannot draw
sufficient power from the Host computer, however, an extra power adapter (not included)
may be required.